Disclaimer: Information found on CryptoreNews is those of writers quoted. It does not represent the opinions of CryptoreNews on whether to sell, buy or hold any investments. You are advised to conduct your own research before making any investment decisions. Use provided information at your own risk.
CryptoreNews covers fintech, blockchain and Bitcoin bringing you the latest crypto news and analyses on the future of money.
The Polygon network, previously known as the Matic network, serves as an Ethereum-scaling protocol that minimizes costs while ensuring robust security. In a brief period, Polygon has achieved significant traction.
A variety of solutions consolidated on a single network distinguishes Polygon from other Ethereum scaling initiatives. It enables developers to focus on the scaling solution that best aligns with their applications. Polygon Labs has been actively engaged in creating scaling solutions utilizing plasma sidechains, a blockchain bridge, various forms of zero-knowledge proofs, and Optimistic Rollups.
By processing batches of transactions on the Polygon proof-of-stake (PoS) blockchain, the load on the Ethereum main chain is significantly alleviated, resulting in quicker transactions. The throughput capacity of the Ethereum base layer is approximately 14 transactions per second, whereas Polygon can potentially manage a much higher number of transactions per second.
Individuals wishing to engage with the network by updating transaction data must stake Polygon (MATIC). Within the Polygon network, a validator’s role is to maintain the network’s security and incorporate transactions into blocks. Validators stake, enabling users to delegate tokens in return for rewards after deducting any fees imposed by validators.
Understanding MATIC Staking
To stake MATIC, individuals must delegate tokens to a validator. Stakers can earn rewards based on the staked amount. Currently, there are no minimum staking thresholds, although validators may set their own minimum limits for staking. Validators may impose fees or commissions for their services. Staked MATIC tokens are subject to an unlocking period of 80 checkpoints, which is roughly three to four days. Stakers wishing to withdraw simply need to submit an unbound request.
It is advisable to consider the credibility of validators before delegating funds to them. Users can access the Polygon staking dashboard for information about validators, including metrics such as active validators, uptime, commission rates, and the required stake amount. These metrics serve as useful tools for selecting trustworthy validator(s):
- Uptime indicates the number of blocks signed within a specific timeframe. A validator’s uptime should be nearly 100%. A lower uptime suggests unreliability, as reflected in their public performance metrics.
- Commission rate represents the portion of rewards that the validator retains for their services.
- The stake amount signifies the total tokens delegated to a validator.
Staking MATIC on MetaMask
MetaMask is a decentralized, noncustodial cryptocurrency wallet that interfaces with the Ethereum blockchain. The wallet is available as a mobile application and browser extension for Google Chrome, Brave, Firefox, Opera, and Edge.
Here are the steps to stake MATIC using MetaMask:
Step 1: Install MetaMask as a browser extension.

To stake MATIC on MetaMask, users must visit the MetaMask website and set it up as a browser extension. Click on “Download.” Users can choose between their current browser or iOS or Android. Select the download option for the browser to add MetaMask.
Step 2: Connect MetaMask to the Polygon blockchain.
MetaMask supports various blockchains. To connect it to Polygon, navigate to “Networks” and select “Add network.” In the window that appears, users must enter the necessary information regarding the Polygon blockchain.

Step 3: Transfer MATIC tokens to MetaMask.
To transfer MATIC tokens to the MetaMask wallet, copy the wallet address and input it as the destination address on the exchange or another wallet. Proceed to transfer MATIC tokens to MetaMask.
Step 4: Connect MetaMask to the Polygon Wallet.
On the following link, click “MetaMask” to link MetaMask to the Polygon wallet: https://wallet.polygon.technology/
Step 5: Stake MATIC via MetaMask.
Once the connection is established, staking becomes available.
Step 6: Delegate MATIC.
Choose a validator to which tokens will be delegated.
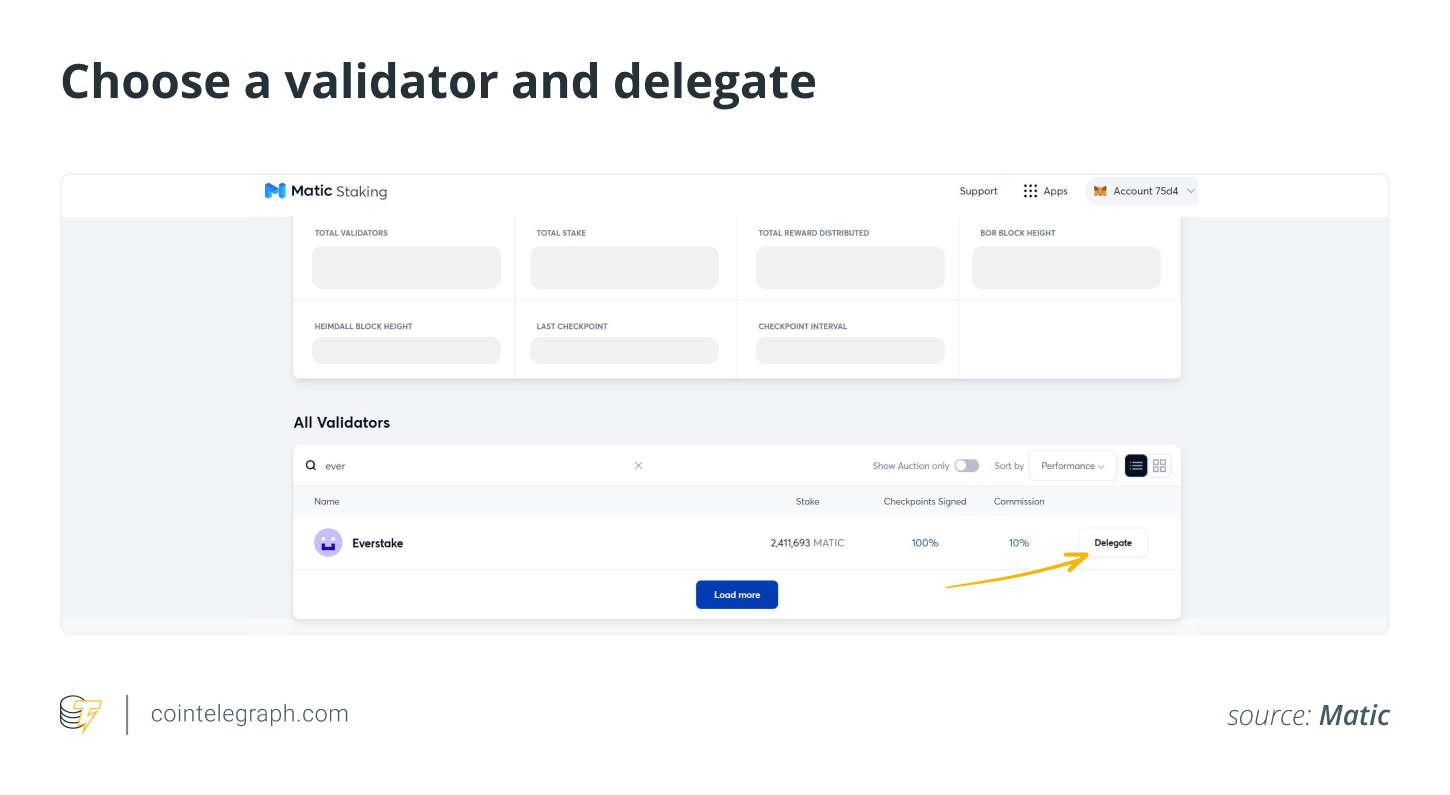
Utilize the control panel for staking. Click on the “Apps” button and then select “Staking.” Enter the validator’s name in the search bar and click “Delegate.” All pertinent information, such as the number of tokens staked, uptime, and commission rate, is displayed next to the validator’s name.
Input the MATIC amount for staking and click “Continue.” In the pop-up extension window, click “Confirm.” The transaction may take a few minutes to finalize, depending on network traffic.
To complete a transaction, stake MATIC and start earning rewards, users must purchase a voucher and cover gas fees. Click “Buy Voucher.” Specify details like the gas limit and price, and re-confirm the transaction.
Delegation is now finalized. Users can choose to “Stake more” or withdraw rewards using the control panel. However, it is important to note that all transactions on the Ethereum network incur fees in Ether (ETH). Therefore, the delegator must have sufficient ETH in their wallet to cover transaction costs.
Staking MATIC on Coinbase Wallet
To stake MATIC on Coinbase, users must utilize a wallet, as the exchange does not offer a staking feature. If users have funds on the exchange but not in the wallet, they will need to transfer funds to the wallet. Although Coinbase Wallet lacks a built-in staking feature, it is still possible to stake.
Here are the steps to stake MATIC on Coinbase Wallet.
Step 1: Install Coinbase Wallet.

Install Coinbase Wallet on your mobile device. For iPhone users, visit the Apple App Store; for Android users, go to the Play Store.
The process involves creating a new wallet, accepting the terms of service, selecting a username, setting privacy preferences, creating a passcode, and backing up the wallet with a recovery phrase for account access in case the passcode is forgotten.
Step 2: Transfer funds to the wallet.
Open the wallet and navigate to the bottom right. Tap there and scroll down the displayed screen. The link “Connect to Coinbase” will be visible. Click the link, and it will prompt for authorization. Once completed, the wallet will establish the user’s connection to their wallet.
Click “Buy or transfer.” When prompted to select a coin, choose “MATIC wallet.” Now, users can input the number of coins they wish to transfer. The wallet will request a verification code. Once successfully deposited, the funds will be transferred. MATIC tokens on the Coinbase exchange are ERC-20 tokens, meaning they operate on the Ethereum network.
Step 3: Stake MATIC.
")
Visit the Polygon website. In the top menu, click “Use Polygon” and then “Staking.” On the subsequent page, click “Become a delegator.”

The user will be directed to a page displaying a list of validators along with their relevant details. The list can be sorted based on four parameters: performance, commission, stake, and random, by clicking a drop-down list on the right side of the page. Users can view the validators in either grid or list format. A search box on the left allows for searching specific validators.
A different page will display additional details about the validator, including the amount of MATIC held in their Ethereum wallet and its dollar value, their stake, heimdall fee, rewards earned, performance index, checkpoints signed, and more. Heimdall fees refer to the costs the validator incurs using the Polygon network to submit checkpoints.
The user must log in by clicking the button at the top-right using their credentials. Users without a Polygon account must create one and click the “Become a Delegator” button.

Users need to enter the number of MATIC coins they wish to delegate and tap “Continue.” Upon clicking “Continue,” a pop-up will appear. The user must click the “Delegate” button to finalize the process.
Staking MATIC on Trust Wallet
Trust Wallet is a decentralized, noncustodial mobile application wallet for storing, exchanging, and transferring cryptocurrency assets. Below is the procedure to stake MATIC on Trust Wallet:
Step 1: Set up a Trust Wallet.
Establish a Trust Wallet on your mobile device. Choose the desired operating system (iOS or Android) and install the application.
Related Posts
If users have previously utilized Trust Wallet, they must import the wallet. Otherwise, they need to create a new wallet. To import an existing wallet, click the “I already have a wallet” button and confirm a six-digit passcode.
If a user is new to the wallet, they must read and agree to the privacy policy and terms of service, create and confirm a six-digit passcode, and back up the wallet with a recovery phrase.
Trust Wallet supports multiple coins, but a multicoin wallet is generally the most appropriate. Since MATIC staking occurs on Ethereum, an adequate amount of ETH and MATIC on the Ethereum mainnet is necessary.
Step 2: Connect Trust Wallet to Polygon.
Log in to the Polygon staking dashboard and click “Become a Delegator.” From the list of wallets, select “WalletConnect” to link to Trust Wallet on Polygon. A QR code will be displayed on the screen.

Return to the Trust Wallet application, navigate to settings, and select WalletConnect. Click the “New Connection” button. Scan the QR code displayed on the Polygon staking dashboard. Click “Confirm” to establish the connection.
Step 3: Delegate and approve the transaction.
Select the validator and click “Delegate.” Enter the number of MATIC coins to be staked and click “Continue.” To authorize the transaction, confirm the smart contract call in the Trust Wallet application.
Return to the Polygon staking dashboard and click “Delegate.” Confirm another smart contract call in the Trust Wallet application. Delegation is now active, and users can start earning rewards.
Staking MATIC with Ledger
Ledger is a widely used device for storing cryptocurrencies. Prior to staking MATIC with Ledger, users need to prepare accordingly.
Step 1: Prepare for staking.
The process begins by updating Ledger Live to the latest version via the link: https://www.ledger.com/ledger-live/download
Connect the Ledger device to “My Ledger” and install the latest version of the ETH app on the Ledger device. Enable blind signing in the ETH app settings. Once the preparation is complete, close Ledger Live to avoid issues when using MetaMask.
Users must also ensure that MATIC is stored in the Ledger Ethereum account and not in the Polygon account, as MATIC staking occurs on the Ethereum network.
Step 2: Connect Ledger ETH account to MetaMask.
Connect the Ledger device to the desktop and open the ETH app. Now, link the Ledger ETH account to MetaMask.
Once the connection is established, navigate to the Polygon Wallet app.
Connect your Ledger Ether account to MetaMask by following these steps.
Once completed, go to the Polygon Web Wallet app, select “Connect to a Wallet,” and then choose MetaMask.
When MetaMask opens in the browser, select the Ledger account, click “Next,” and then “Connect.” Ledger will display “Sign message.” Select “Sign message” and press both buttons simultaneously to confirm. Now, MetaMask is connected to the Polygon Wallet app.
Step 3: Choose a validator.
Select “Polygon Staking.” In the app’s top-right corner, click the “Login” button and select MetaMask again.
Choose a validator from the list that appears. Users should consider two factors: a high score for “Checkpoint signed” and a low “Commission.”
Step 4: Delegate.
Click the “Delegate” button, enter the amount of MATIC to be staked, and click “Continue.” MetaMask will display “Give permission to access your MATIC?”
Review the fee amount; if it appears acceptable, click “Confirm.” Ledger will then show “Review transaction.”
Select “Accept and send” and press both buttons simultaneously to “sign the transaction.” Ledger will indicate “Application is ready.”
Return to the Polygon Web Wallet App, select a validator, and click “Delegate.”
Review and confirm the transaction through MetaMask and Ledger devices. Once the Ethereum network confirms the transaction, the screen will display “Delegation Completed.”
Staking MATIC using ZenGo wallet
ZenGo is a self-custodial wallet that is compatible with WalletConnect, eliminating seed phrase vulnerabilities. Below is the process for staking MATIC using a ZenGo wallet.
Step 1: Install the ZenGo wallet on your mobile device.
Visit the ZenGo website, select an operating system (iOS or Android), and install the application on your mobile device. To expedite the process, users can scan the QR code.
Open the ZenGo app, enter an email address, and tap “Continue.” ZenGo requires email address verification. To confirm, access the inbox by tapping “Open My Email” in the ZenGo app, then tap “Tap to Confirm” in the received email. After verifying the email address, enable biometrics for enhanced security.
Create a Recovery Kit for fund safety and easy access when switching devices. As a noncustodial wallet, ZenGo shares an encrypted secret key share. A portion of the key stored on the device aids in unlocking the wallet and using it with a face scan. Once the Recovery Kit is created, tap “Done.”

Step 2: Connect ZenGo wallet to Polygon.
Users must connect the ZenGo wallet to Polygon. Open the link https://staking.polygon.technology/
Navigate to the Polygon staking dashboard. In the upper right corner of the screen, tap “Login.”

Select WalletConnect from the list of available connections. The WalletConnect protocol allows users to link ZenGo to Polygon. A QR code will appear.
Go to the ZenGo wallet homepage and tap the “Connect to Apps” button in the upper right corner. Scan the QR code.
Step 3: Choose a validator and delegate MATIC.
The process of delegating MATIC now begins. Ensure you have MATIC in ERC-20 format and 0.05–0.1 ETH for fees, as delegation occurs on the Ethereum mainnet.
On the Polygon staking dashboard, scroll down to find information such as the network’s overview, active validators, their stake amounts, uptime, commission, and health metrics.
Select a validator after evaluating the metrics and tap “Delegate” at the bottom-right of the screen.
In the pop-up box that appears, users need to enter the amount of MATIC to be staked and tap “Continue.” Staking can be done with as little as 1 MATIC. To confirm the transaction, return to the ZenGo app and approve the transaction in the pop-up window.
Return to the Polygon staking dashboard and tap “Delegate.” In the ZenGo wallet, confirm the transaction and wait for approval.

Once delegation is active, users will start receiving rewards. At each checkpoint, rewards are accumulated.
Rewards can be found in the “My Account”